
Boat-Brewing: Brewing Beer on a Boat
The goal of this amateur short guide is not about how to brew beer. The goal is to focus on how to keep your costs low, the equipment small and your water usage to an absolute minimum. If you want a better overview on the brewing process I suggest you start with How To Brew a fantastic website which covers a range of topics and he has a free ebook. Also visit Brew Your Own and there are many You Tube instructional videos about brewing for more help. For more advanced information try Beer: Tap into The Art and Science of Brewing an excellent book.
Most boaters first question when I tell them about "boatbrewing" is, what does it cost? Normally this isn't the right question to ask however in many parts of the world beer can be expensive and making it yourself can be cost effective. This isn't normally the case. Very cheaply made beer from extract only techniques will probably run you about $40 per 5 gallons or 50 bottles. That's about $0.90 per beer not including the initial setup costs which our bare-bones setup is about $70. Upgrade to adding grains, hops and some other additives and you're probably looking at about $60 or about $1.10 a bottle. This cost is not bad if decent beer in the store runs over $10 a six-pack.
Deviations From The Mean
The main differences with this “Boat Method” is mostly in the cleaning techniques and bottling. In standard brewing recipes often a second fermenter and a bottling bucket with a raking cane is used. All of this is avoided in this method. The spigot on the fermenter eliminates the raking cane and the need for siphoning. Second fermentation is an extra step that isn't required and on a boat this would probably be hard to transfer the beer into the second container, not to mention you'll need another large container taking up space.
When bottling priming is done in the fermenter (or added to each bottle), the fermenter spigot is used to fill each bottle avoiding the need to siphon and a raking cane.
These few items aside, all the basic brewing instructions apply as normal.
Complications: Space, Water, Cost, Temperature
Space
Unlike most home brewers space restrictions are much more complicated on a boat. Unfortunately it takes about the same amount of work to brew 1 gallon of beer as it does to brew 5 gallons. So while we started with 1 gallon batches and small equipment, we quickly realized the trade off for size was not worth the effort. Anything less than about 3 gallons is a lot of work for a little bit of beer. At a minimum I suggest you make space for a 5 gallon bucket, 16 Qt. (4 gallon) pot and about 50 beer bottles. If you spend some time shopping around you can find a cooking pot that will nest inside or outside the bucket for tighter storage.
A 5 gallon fermentation bucket (the Home Depot Style – but look for the food grade version) means you can make about 4.5 gallons maximum of beer, and a 4 gallon pot means you can only cook about 3.5 gallons maximum. It is very common to cook a small amount of beer, say 2-3 gallons and then add water that you've sterilized by boiling and allowing to cool in the fermenter to get the quantity of desired beer. An 7-8 gallon fermenter is required to brew 5+ gallon batches. If you choose to go with a 4 gallon brew size (5 gallon fermenter) you can still use the 5 gallon brew kits that are everywhere, you'll just have a bit stronger beer in the end. If you put too much in your fermenter be careful the krausen (yeast related gunk) doesn't foam up into the airlock. If it does you'll need to switch to a blow-off tube. (See the How To Brew website/book.)
Water
Also unlike most home brewers boat brewers will have to employ different cleaning techniques to keep water use to a minimum. There are two key pieces of equipment that can help you do this: a spray bottle and a pressure sprayer.
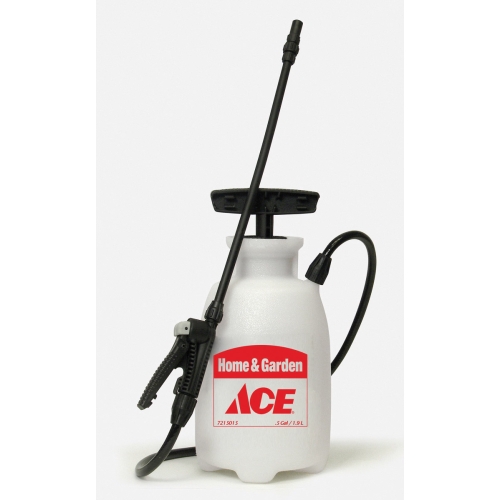
The 1/2 gallon sprayer allows you to clean large areas and inside bottles using very little water. A little bleach should be added to aid in sterilizing. On a boat the sprayer can also serve double duty as a shower or a quick and portable way to rinse and clean things.
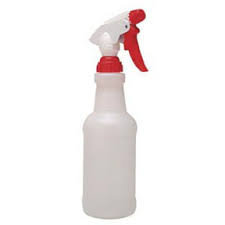
The small spray bottle should be used during the second round of cleaning using a no-rise type cleaner like StarSan. This small spray bottle will be used throughout the cooking and cooling and bottling process to maintain a sterile environment with very little water required. See the section “Before You Start” on cleaning for more details.
Cost
Cost is especially important on a boat because often you can not mail-order supplies when you need them. You'll want ingredients you can store for a long time yet are still flavorful when you need them. So let's over the 3 basic brewing options from least cost and space to most cost and space.
- All Extract: Many good beers can be made from extracts. However if you're picky about your beer you'll find the flavor may be lacking. The big benefits of extract brewing is it is very compact, lowest cost and will store for a long time. Don't be fooled into thinking you can't make great extract-only beer, many win contests all the time. And there are many good kits out there that make brewing quicker and easier. I highly suggest starting with an all-extract kit and some fresh yeast. (See the How To Brew website for a great first-time brew recipe and walk through.)
- Partial Mash: A good compromise between all extract and all grain brewing. This combines both extracts and grains (via the mash). This produces good fresh flavors that are more complex than possible with straight extract brewing. The downside is you'll need to store grains and for longevity you need to keep them uncracked. When you are ready to use those grains you'll need a way to crack them (not grind or pulverize!). This requires more equipment and some extra brewing steps.
- All Grain: This is a more advanced technique that allows you to produce full flavored beers of a wide range. This method takes up more space and also requires a way for you to crack the grains.
Temperature
Very few boats offer a controlled temperature for fermenting beer. This means you're a bit limited by what you can brew. Normal ale fermentation temperatures range from 68 to 72 °F (20 to 22 °C) and lagers (most common brand name commercial beers are lagers) fermentation temperatures from 45 to 55 °F (7 to 13 °C). Also keep in mind that the heat generated by an active fermentation can warm a typical 5-gallon (19-L) batch of beer by 4 to 5 degrees Fahrenheit (~3 degrees Celsius). We have successfully brewed IPA's in 85 °F tropical weather, however you have to expect there will be some flavor changes. Fermenting above the normal temperature range may produce excessive fruity-flavored esters or harsh-flavored fusel alcohols.
Strong hops for IPA's and Porters can often mask these byproducts quite well, but perfection will be hard to achieve. And don't expect to be able to make lagers in the tropics without some kind of proven cooling method. Lagers also take longer to ferment and process, so ales are probably a better choice anyway. A large water tub can be used to stabilize the fermentation temperature by filling it with cooler sea water and placing the fermenter in it or you could use an evaporation method. (See “Improving your brew” for more tips.) But remember to keep the fermenter in a dark place.
The Gear
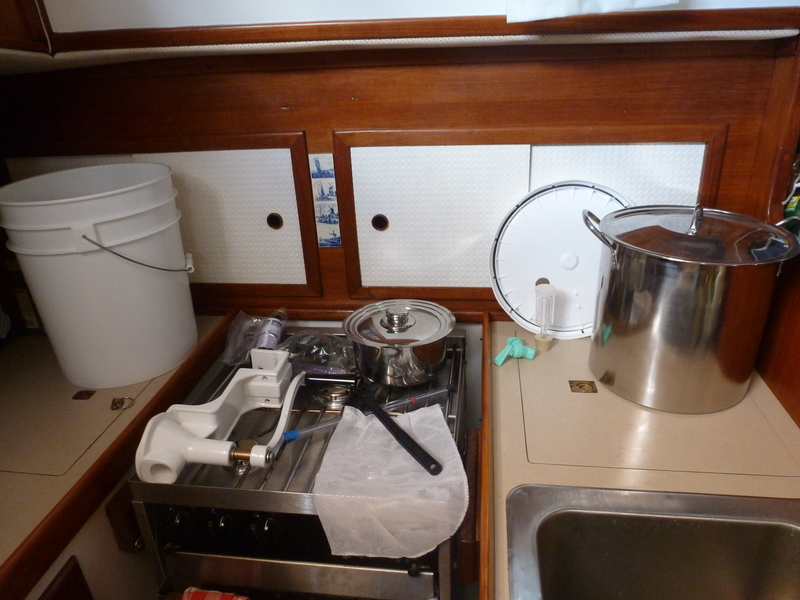
Many home brewers will cringe at this setup but this is the most compact and efficient setup we've come up with. It involves a stainless brew pot for cooking the beer (called Wort), and a single 5 gallon bucket that acts as both the fermenting and bottling bucket.
This setup is primarily for doing Partial Mash brewing where the grains are steeped in a bag (like tea) along with the extracts. In this photo you can see the white 5 gallon food safe bucket on the left and the lid with a nice tight gasket on the right and hole for the airlock. Also near the lid is the plastic airlock with rubber bung and the light aqua spigot (which will be installed 3” from the bottom on the fermenting bucket). The stainless pan is 16 Qt. and fits nicely inside the 5 gallon bucket for storage.
On the stove clockwise from the lower left is the hand mill which we use to crack grains (not all parts are visible), above it is the small bottle of Star San cleaner and the milling wheels in a plastic bag. The small pot is used for boiling water to remove any chlorine and kill any bacteria. This water will be used for pitching the yeast and perhaps adding to the beer when it is ready to ferment. Below that is a plastic spoon (don't use wood it is too hard to sterilize), a thermometer and the white mashing bag for holding the cracked grains.
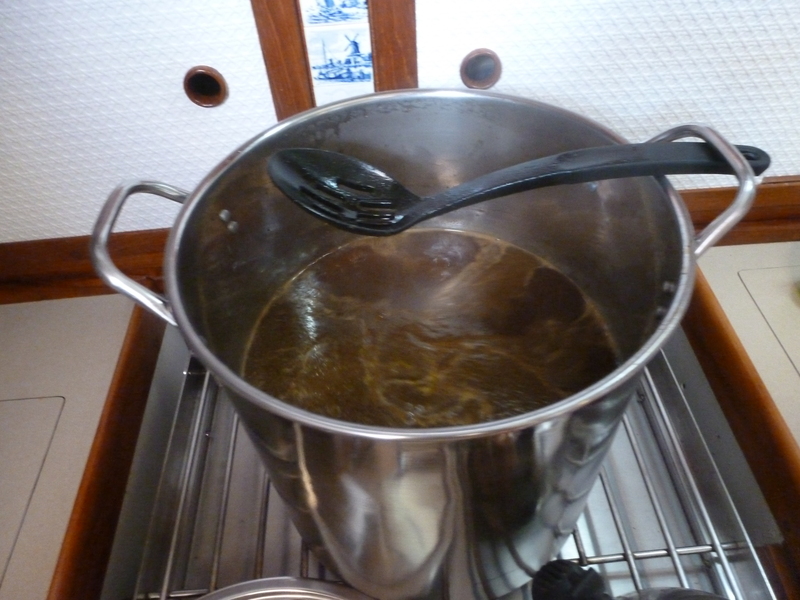
If you want to simplify this with all extract brewing you won't need a way to crack the grains or the mash bag. Here's a photo of the wort in progress.
Breakdown of Costs
Some of these items we had to shop around quite a bit to find. A 16 Qt. stainless pot is a good size but if you can get a bigger one to fit on your boat then try it. You can also get by with aluminum or a standard enamel “canning pot” if you're in a pinch. Lots of third world countries seem to have a surplus of large aluminum pots. The life span of non-stainless pots when exposed to sea air or salt water will naturally be shorter. The basic kit will probably run about $70 (including shipping, etc.).
If you don't want to know the alcohol content or the fermentation progress of your beer you can skip the Hydrometer, but it is a nice tool to have once you start doing more batches. It is used for checking the fermenting progress, which on a boat in a hot climate it is best to bottle as soon as the primary fermenting is complete. Of course the first thing everyone asks when they try your beer is, “How strong is it?” Without a hydrometer you just have to make a guess.
Brew supply stores often have plastic fermentation buckets and if you have space, then get an 7-8 gallon one so you can make bigger batches. This will probably run you about $20 to $25.
Options:
- Upgrade to an 8 gallon bucket w/ airlock and spigot for bigger batches.
- Many boaters have a hand held Infra-Red (IR) temperature meter (often with a laser too). These are ideal for beer brewing as you can monitor temperatures without touching (contaminating) anything.
Before You Start
Clean everything. Then clean it again. Remove any grime or bits that are visible because they can harbor bacteria that sterilizers can not reach. Clean the walls, ceiling, floor, counter tops, dish racks, sinks, drawer handles, fans, everything. Keep dust, pet hair, sneezes and even breathing to a minimum to prevent exposure. Think of your galley as a surgical room and your beer as a brain surgery patient. Don't pickup something that hasn't been sterilized then grab your thermometer to make another temperature check. Keep things sterile as you go with the little spray bottle. Give surfaces a light spray once in a while to keep them sterile. There are a thousand things that would love to eat your beer before your yeast does, so don't give them a chance.
Brewing Tricks
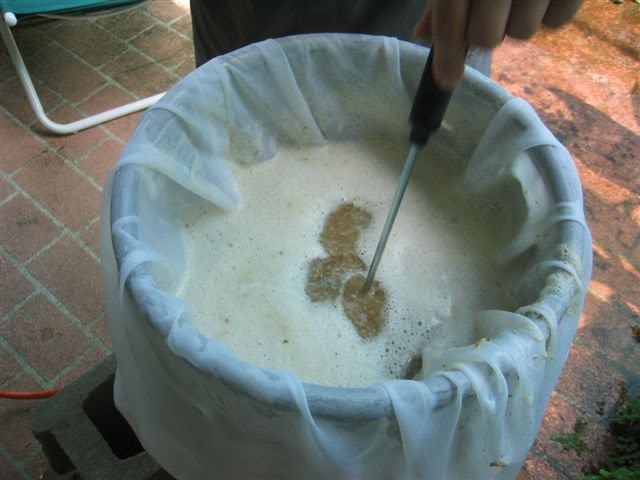
If you are doing partial mashes instead of a mash bag you can just by a yard of bridal veil material. Cut this down so you can line the inside of your pot with about 10 inches of excess at the top. This will act like a giant tea bag that you'll put the grains in and close the top with some string. When you are done with steeping the grains, you can just lift the bag out and pour some cold sterile water through it (called sparging) and then dispose of the grains. This material is finer than the mesh bags we've seen and having a big sized piece of it makes sure nothing gets spilled and is easily and cleanly removed from the pot.
Cooling Tricks
The faster you cool the beer (wort) the less likely it will be exposed to bacteria and you will remove some proteins that can cause hazy beer when bottled and chilled. However on a boat, access to ice isn't often possible. You can use a water bath (even with 85ºF water) to bring the temperature down faster or add water that you previously boiled and let cool earlier to make the volume of beer you want to ferment.
If you can use ice! If you have access to purified ice, and you know it is purified, you can use this to cool your beer (wort) and at the same time dilute the wort to the proper amount. 7 pounds of ice is equal to 1 gallon of water. So if you have cooked 3 gallons, add 7 pounds of ice to round it out to 4 gallons and help cool the wort faster. If it isn't purified, clean, and handled properly you will ruin your batch of beer. This can be a great time saver on a boat, especially in the hot tropics where cooling things down takes a long time.
If you're not sure of the ice's purity, then don't add it directly to your wort. Make an ice bath with it and only add purified chlorine free water directly to your wort. You can also salt your ice bath (or use salt water !) to help reduce the temperature of the wort faster. Some people freeze plastic bottles of ice water and use them in the ice bath, but on a boat few of us have freezers and even fewer have extra space in them.
Bottling Tips
Use the pressure sprayer and a bottle brush to clean the used beer bottles. Get them super clean and then sterilize them using the small spray bottle and the no rinse cleaner. Clean them inside and out and give them plenty of time to drain and dry. Don't forget to sterilize everything including the bottle caps, the bottle capper, and all the surfaces.
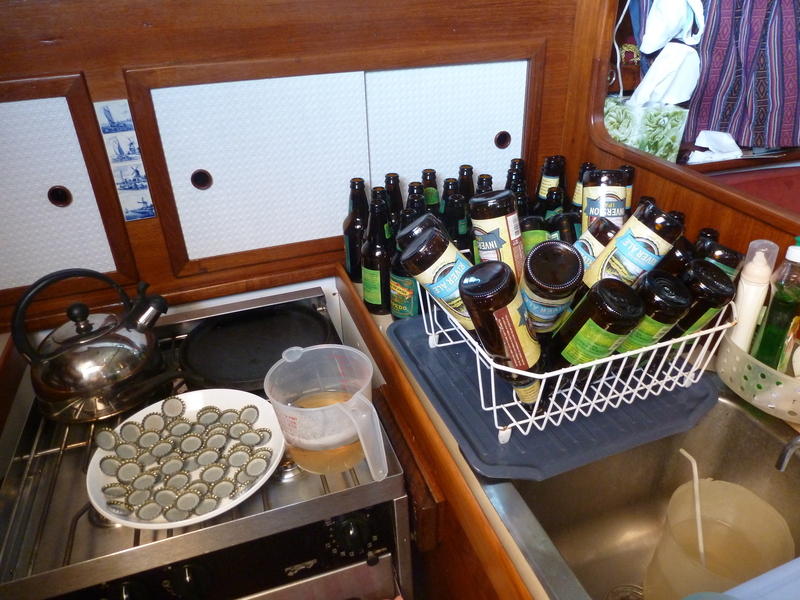
Also shown in this photo is the priming sugar in the measuring cup. We carefully mix this into the fermenter prior to bottling. Don't stir up the yeast that has settled to the bottom. Don't stir in any extra oxygen while mixing it in and make sure you mix it well so the sugar is evenly distributed. This step is normally where home brewers would move to a “bottling bucket”. However for our space constrained lives, this is an unnecessary step and using the spigot on the fermenter you can go directly to the bottles once you've primed it.
Some brewers prefer to put the primer into each bottle. It is hard to know how many bottles you'll fill and it is complicated to get the amount equal in every bottle. However with a dropper and a good estimate of the volume of beer you could easily make this method work without worrying about stirring the yeast or introducing oxygen.
Advanced Planning Helps
- Cooking the beer takes at least an hour on high and can use a fair bit of propane. Make sure you are somewhere where you can buy more.
- Obviously it gets quite hot in the boat while cooking. You might want to wait for a cool day or for a time when you are alone on the boat.
- After the cook is done and cooling you have to be careful not expose any thing including your beer to something unsterilized. Since this is in the middle of your living space waiting for it to cool and working around it can be difficult. You might want to prepare lunch before you start brewing so you don't disrupt the process. You don't want strong breezes or fans blowing air over your exposed wort either.
- It is best to be in a calm anchorage to avoid spills and allow the yeast to settle out of the beer better.
- When saving empty bottles for your boatbrew, rinse them out well directly after drinking them (salt water is fine then rinse with fresh), dry them and store them in plastic bags so they don't collect dust. This will make bottling day much easier when you go to sterilize them and clean them out. If you are inheriting old bottles, scrub them out well with a bottle bush. Hold them up to the sun and examine them for particles, you might be surprised at how things collect inside. Clean them well now. Then rinse and sterilze them on bottling day.
Improving Your Brew
Once you get the hang of brewing on the boat here are some things to think about to improve your process.
Controlling the fermentation temperature. This is probably the hardest thing on a boat, but if you find a place with cooler sea water, or with cool fresh water run off use it to create a bath for your fermentor. Some people have had luck with making an evaporation type system with just a fan and some thin we tee-shirts. The happier you keep the yeast the better it will work to improve your beer.
Have Patience. Allow fermentation to complete then wait a few more days. The only caveat here is if the temperature is not near the yeast's ideal fermenting temperature. If the temperature is off significantly then it is best to not wait too long in the fermenter. After bottling allow it to chill undisturbed for at least two weeks so suspended particles fall to the bottom. Like a good soup or pasta sauce, give the flavors a chance to mingle and mellow.
Chilling the Wort. A wort chiller can really help improve flavor. If you're still at the stage where you're doing partial boils of extract recipes, this isn't quite necessary. You can fill a sink/tub with ice-cold water, set the brew pot into it, and gently stir the wort. A typical 3 gallon boils cool down to 75F in about 20 minutes using this method which is pretty efficient. There are more complex wort chillers but these often don't work well on a boat. Also as mentioned earlier purified ice that has been properly handled can be added directly to the wort. A wort chiller has several advantages:
- Better cold break (group of proteins that need to be thermally shocked into precipitating out of the wort preventing “Cold Haze”)
- Less chance for unwanted organisms to contaminate the wort
- Minimizes the time wort is in the Dimethyl Sulfide (DMS) producing temperature range (corn aroma/taste)
- Better retention of hop aromatics and flavor
Document it. Write down everything you do. Don't kid yourself into thinking "I don't have to write this down, I'll remember", because you won't remember. The better you are about this, the easier it will be to do things repeatably. What temperature did you mash at? What was the pre/post boil gravity, What was the pre/post boil volume. When did the hops go in? How long did chilling the wort take? What was the gravity after X days of fermentation? If you hit upon a beer you really enjoy, you'll want to repeat your process.
Try All Grain. Fresh ingredients and all grain brews can generate much more powerful flavors. There's really no substitute, however all-grain brewing on the boat requires more storage space for the grains and equipment to crack them. The upside is tasty beer.
Better Caps. Oxygen absorbing bottle caps help preserve the flavor and improve storage time for beer. They cost a little more but they might be worth it. We haven't tried them.